Serving sailors online since 1997
Hunter OEM Parts
General Marine Parts
Installing a battery monitor
posted 08-05-2021 by Juice6576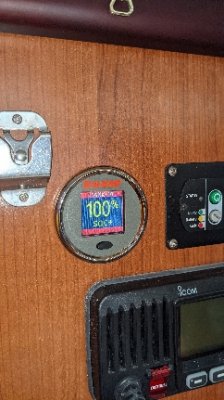
Click for larger view

We wanted to be able to monitor key parameters with our house batteries. After a lot of research, I chose the Balmar SG200 Battery Monitor. The monitor was installed at the Nav Station. But this was the easiest part.

Click for larger view

The installation manual is pretty good, but also generic. The MH-37 has two 4D house batteries located below the cabin sole, one on each side of the companionway. The shunt needs to be installed where it could monitor both batteries that make up the house bank. The MH-37 uses a common ground system and the main ground bus is in a locker under the helmsman seat. The first task was to figure which ground leads went to the house batteries.

Click for larger view

I installed the shunt alongside the common ground with 3/4 pan head screws.
After verifying both of the house battery negative leads, I installed them on the BATT terminal on the shunt. I fabricated a 15 inch long jumper from 2/0 cable. This jumper was run from the shunt to the common ground bus
After verifying both of the house battery negative leads, I installed them on the BATT terminal on the shunt. I fabricated a 15 inch long jumper from 2/0 cable. This jumper was run from the shunt to the common ground bus

Click for larger view

Next, we had to run the communication cable from the meter to the shunt. It was actually pretty easy to feed the cable down along the hull to the shunt.
Basically, I followed the big red cable in the corner.
The excess cable was neatly coiled and tied off with tie wraps.
Basically, I followed the big red cable in the corner.
The excess cable was neatly coiled and tied off with tie wraps.

Click for larger view

Once the communication cable was routed, the connector was installed and plugged into the terminal on the shunt.

Click for larger view

Finally, it was time to run the power supply cable to the nearest battery positive terminal. I used a fish tape to follow the cable run back to house battery #1.

Click for larger view

Once in the battery locker, I installed the fuse holder as close as possible to the battery positive terminal. The lead between the fuse holder and the terminal lug is short as required by ABYC, so the fuse holder has to be close to the battery.

Click for larger view

After hooking up the new AGM batteries that were being installed at the same time, the power supply fuse was installed and the unit powered up.
The unit was set up per the Balmar manual. Now I can monitor state of charge, voltage, amps and time remaining.
The unit was set up per the Balmar manual. Now I can monitor state of charge, voltage, amps and time remaining.